
It has been a considerable amount of time since my last gear review. This time, the focus will be on a lighting accessory that is gaining popularity rapidly and proves to be exceptionally practical.
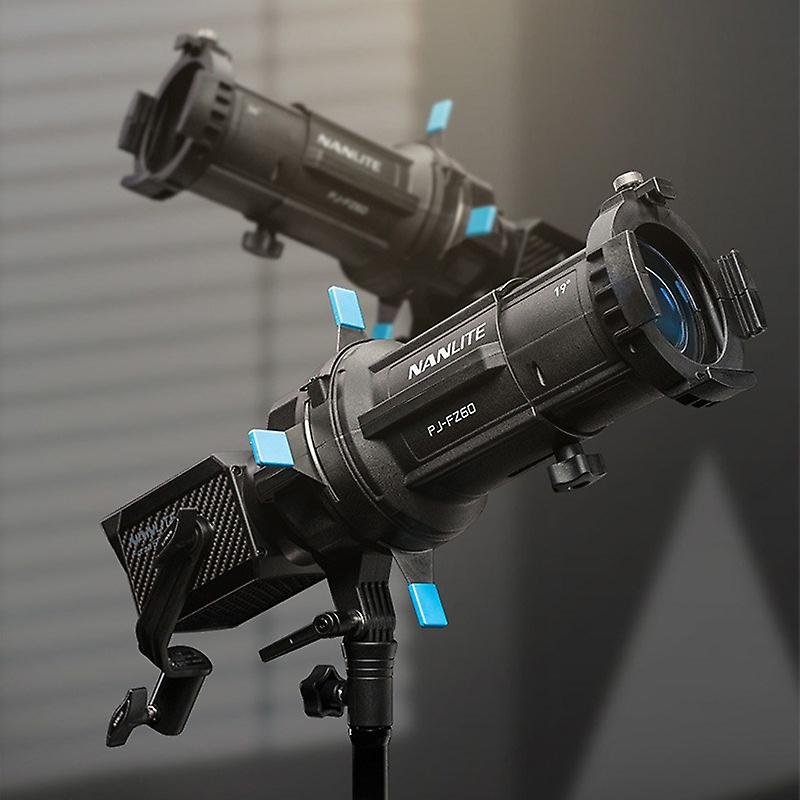
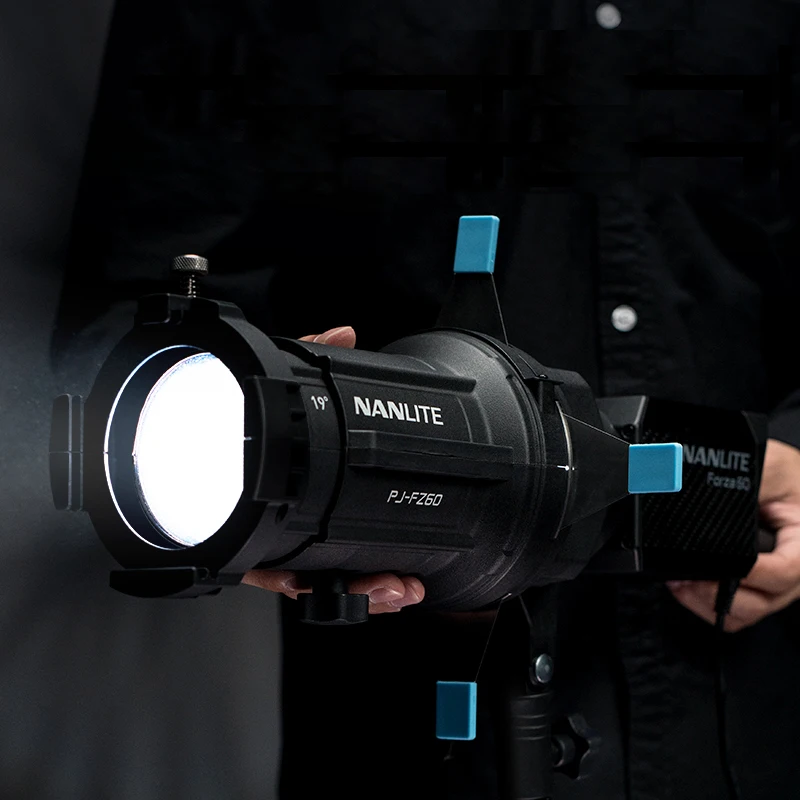
Specifically, we will delve into the assessment of the projection attachement from the Nanlite Forza 60 series in this review the PJ-FZ60-19.
What is a Projection Attachment ?
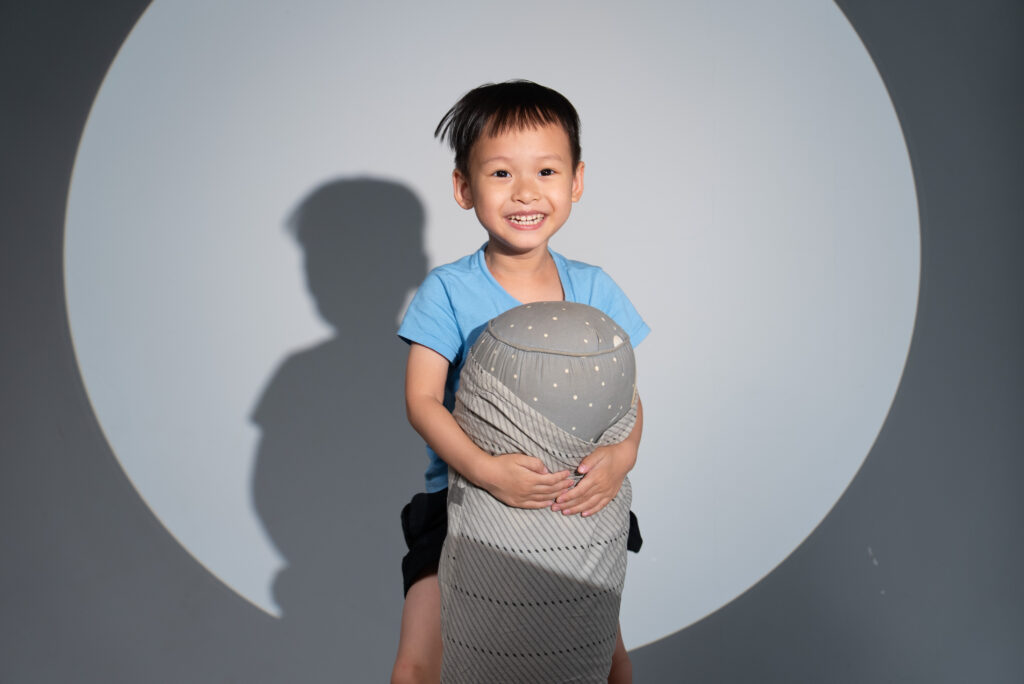
A projection attachment serves as a lens designed to assist in concentrating light into a precise and sharp circle.

Moreover, this attachment provides the capability to manipulate light using blades, enabling the creation of specific rectangular shapes.

OUR SPONSOR OF THE DAY : NEONNIGHT.FR
Lastly, these spotlights allow for the utilization of what is commonly referred to as gobos. Gobos are small metal disks with cut-out shapes.
What are the use of the Projection Attachment ?
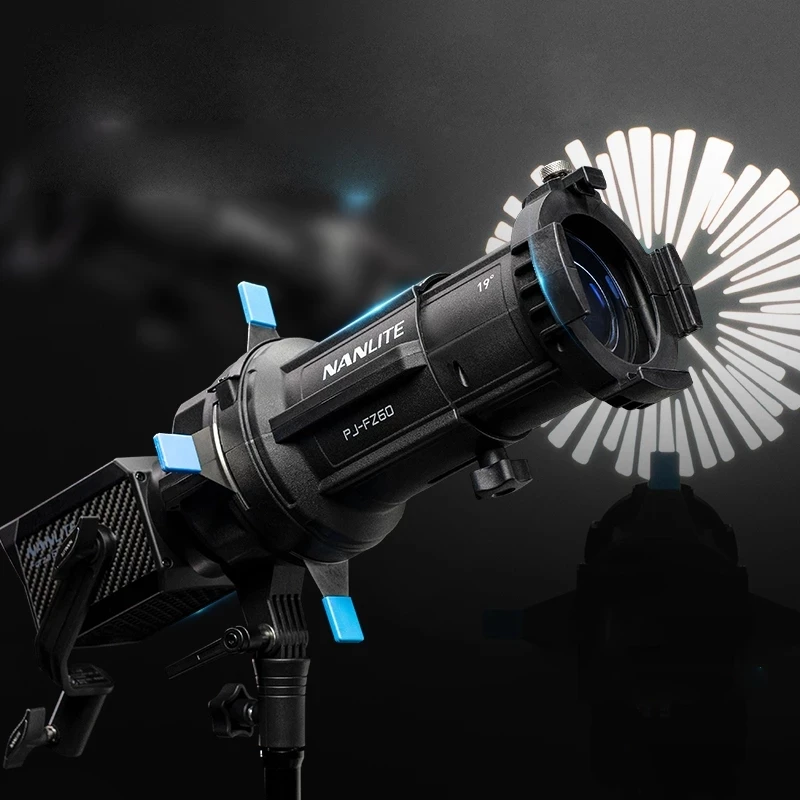
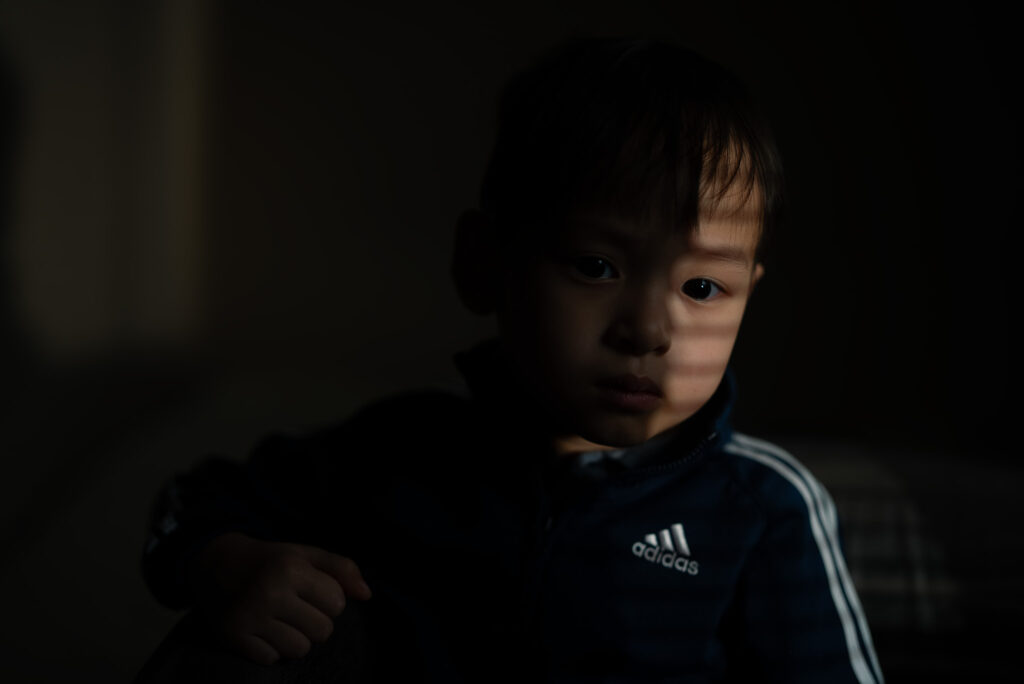
This tool works very similarly to a fresnel with barn doors. It helps you focus the light to a specific diameter, but unlike the fresnel, the projection attachment can set up the focus, so the end result is very sharp.
The projection attachment is not just sharp but much more precise than a regular fresnel lens. This means that you can reproduce some very specific shapes, such as a window or a tree shadow on the wall, for example.
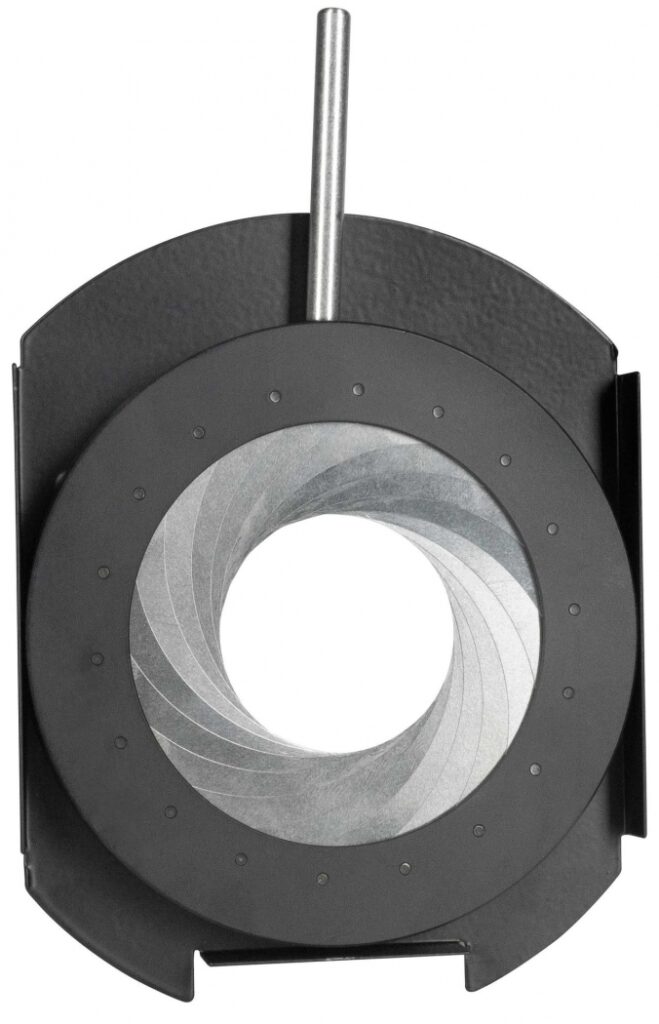
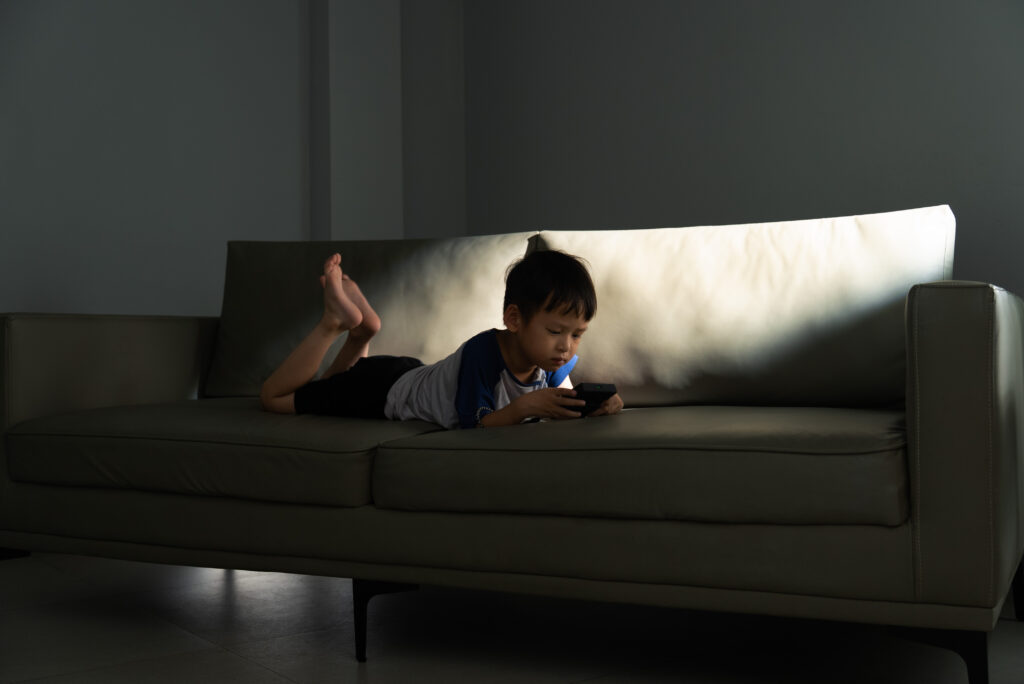
For me, the best use for this projection attachment is to focus the light on a very specific area of the object or the face using the iris with the blades. This helps me have full control over a hard light.
Why choose the PJ-FZ-60-19 over the PJ-BM-19/36 ?
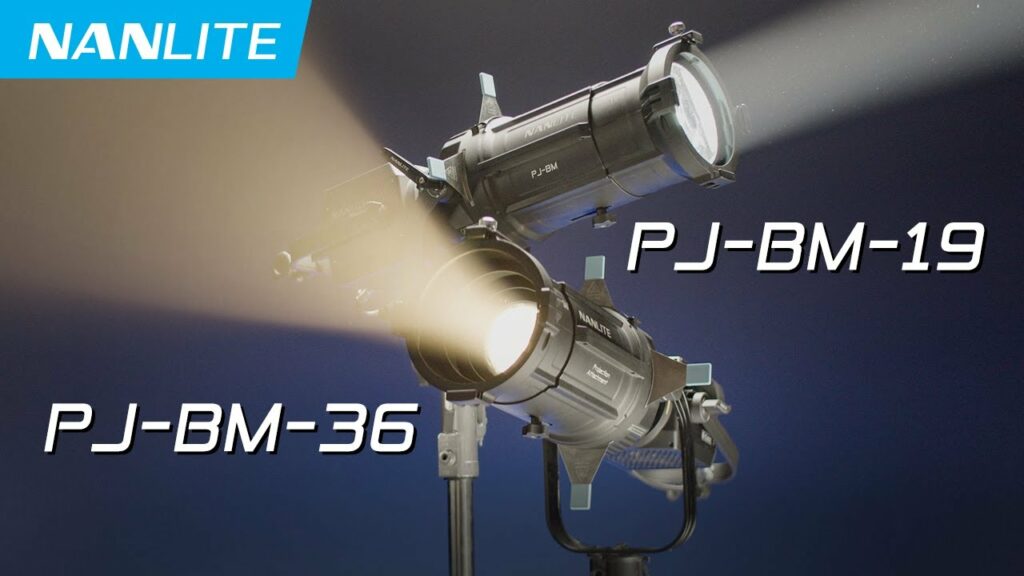
The main difference is that one is made for the FM mount for the Forza 60 or 150 series. Whereas the second one is made for the larger Bowens mount light, the Forza 300, 500, and 720 series, such as the Nanlite Forza 500B II.
The later Bowens Projection Mount is absolutely bigger and heavier, with 4.2kg just for the unit and 3.8kg for the 19° lens. Now you can add to this the light, and you’ll have over 12 kg of gear that you’ll have to move around.
It is so big and heavy that it needs a flight case to be moved around as opposed to a regular padded fabric bag.
The price is also a factor, since the Bowens mount version is very close to double the price of the FM version.
In this particular instance, I needed the projection attachment to do some specific tasks, such as pack shots and rim lighting.
I felt like using a lighter combo on a lighter stand would give me much more nimbleness to point the light to a very precise point.
Lastly, the light coming out of the unit is so focused and condensed that with a Nanlite Forza 60B II, I can basically compete with the sunlight during the day inside a room. That’s quite insane.
Why choose a 19° over a 36° lens ?
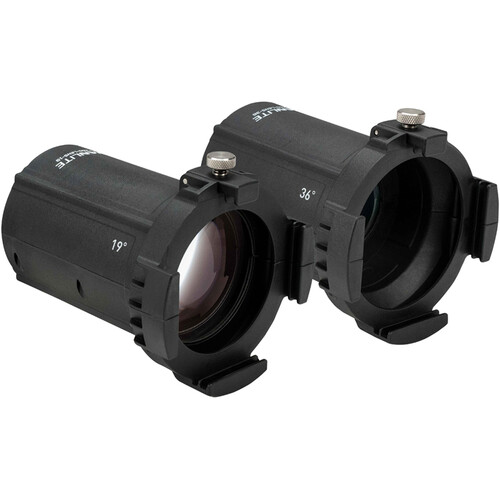
For the same reason, I plan to use this small and light projection attachment for some precision work. Although using an Iris should equalize this, I still feel like the 19° lens will give me a smaller beam of light overall.
For product photography, I find the 19° angle excellent. However, for portrait work, I’d prefer using the 36° angle unless you have plenty of space to position the light further away.
Each lens can be purchased individually for approximately 162 euros, occasionally discounted to around 120 euros, which is still somewhat pricey given that the entire set costs around 300-320 euros.
For portrait photography and the 36° lens, it might be more practical to opt for the Bowens mount version, as it offers greater power and flexibility.
My experience using PJ-FZ-60-19
The build quality
This particular projection mount is supposedly made out of nylon, which makes it very smooth to focus on and very light to carry around.
On the other hand, I was a bit surprised to see that the projection mount didn’t have any form of cover in the back or in the front.
The included accessories
Although I would have liked to have the Iris included, which was another 58 euros, I was surprised to see that they included four gobos with it and a adapter for larger gobos holder as well.
The bag used for this accessory is basically the same as the one for the 60B II. You can actually store them together in a single bag if you want.
The experience

It’s honestly a breeze to use this in combination with the 60B II on a cheap light stand. Everything feels solid and light.
It’s quite easy to focus the light, whether it’s on the blades, the iris, the gobos, or the circle. The projection attachment has its own baby pin mount, so the combo stays well balanced.
The lens quality
The lens is quite sharp and well optimized for the 60 and 150 series, respectively. The gobos can’t always have the whole shape in focus, but that’s something that’s also an issue with other brands, such as Aputure. I believe it is due to the convex nature of lenses, sometimes blades cut can also be slightly distorted.
How does it perform with a bi-color light ?
Bi-color lights have two types of emitters; these can be seen when using a projection mount if you are very close to the lens.
After a bit of distance, the light ray should blend more, and this effect shouldn’t be visible unless you are really looking for it by making diagonal cuts or putting the lens out of focus.
OUR SPONSOR OF THE DAY : NEONNIGHT.FR
Downsides
The sole drawback I can identify with this light modifier is its mounting point, which is crafted from PVC, and the locking mechanism, which is entirely plastic.
Achieving a secure lock is challenging, and what’s worse, it tends to shift even when fully secured, making precise adjustments very difficult. I suppose this compromise is necessary to maintain its lightweight design.
I would have preferred something sturdy enough to allow easy adjustments without the need to loosen and tighten it again, risking shifting it in the process.
Verdict
8.0 out of 10.
The PJ-FZ60-19 projection attachment from Nanlite is, in my opinion, a must. If you are a cinematographer, a packshot photographer, or simply need to be very precise with your light on some occasions, this is the best tool by far.
Choosing between the smaller FM and the larger Bowens mount would depend on what usage you need this tool for.
With a small 60-watt light, you can already compete with the sun during the day inside a room and project very far at night. So the bigger version only makes sense if you really need the output.
For a solo film maker, I think the smaller version is a better option to carry around. For small production teams looking to create patches of sunlight or bounce the light from the other side of the room with precision, the Bowens mount version with a 500-watt light will be a welcome addition.
Informations
Nanlite PJ-FZ60-19
Official website: https://www.nanlite.com
Official page: https://www.nanlite.com/parts-pj-fmm-19-36?t=1706907680211#/en/PJ-FMM-19/36
Our Video Production Company: https://www.neonnight.fr/en/
Samples using the Projection Attachment :
Packshots
https://www.neonnight.fr/en/portfolio/viwone-packshots-dark
https://www.neonnight.fr/en/portfolio/viwone-packshots-bright
https://www.neonnight.fr/en/portfolio/personal-espresso
Studio Portraits
https://www.neonnight.fr/en/portfolio/viwone-create-together-drip


GIPHY App Key not set. Please check settings
One Comment